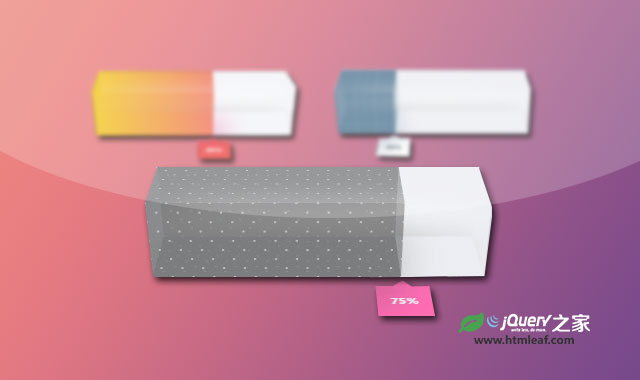
这是一组通过纯CSS3/Sass制作的效果非常炫酷的3D立方体进度条特效。这组特效中展示了如何使用盒子阴影和渐变来制作各种不同效果的3D立方体进度条皮肤效果。
该3D立方体进度条的UI使用纯CSS制作,由于使用的都是一些比较新的CSS3属性,所以要得到最佳体验效果必须使用最新版本的现代浏览器。由于IE浏览器不支持transform-style: preserve-3d属性,该属性用于制作立方体效果,所以在IE浏览器中是看不到进度条的立方体效果的。
使用方法
基本HTML结构
该3D立方体进度条的HTML结构采用立方体的基本结构:
<div class="perspective">
  <div class="bar" role="progressbar" aria-valuenow="0" aria-valuemin="0" aria-valuemax="100">
    <div class="bar-face"></div>
    <div class="bar-face"></div>
    <div class="bar-face"></div>
    <div class="bar-face"></div>
    <div class="bar-face"></div>
    <div class="bar-face"></div>
  </div>
</div>
注意这里的代码使用Sass来编写。首先需要设置一些变量和初始样式。
$light-gray: #e0e0e0;
$magenta: #ec0071;
$white: #f5f5f5;

.perspective {
  font-size: 5em; // sets the main scale size
  perspective: 12em; // sets the perspective
  perspective-origin: 50% 50%;
  text-align: center;
}

.bar {
  display: inline-block;
  width: 1em;
  height: 1em;
  margin-top: 1em;
  position: relative;
  transform: rotateX(60deg); // sets the view point
  transform-style: preserve-3d; // perspective for the children
}
.bar {
  // -> The SCSS written before
  .bar-face {
    display: inline-block;
    width: 100%;
    height: 100%;
    position: absolute;
    bottom: 0;
    left: 0;
    background-color: rgba($light-gray, .6); // just to see what is happening
  }
}
设置立方体的各个面
设置立方体的各个面的工作实际是在制作一个立方体,需要为各个面指定一个class类。
<div class="perspective">
  <div class="bar" role="progressbar" aria-valuenow="0" aria-valuemin="0" aria-valuemax="100">
    <div class="bar-face roof"></div>
    <div class="bar-face front"></div>
    <div class="bar-face left"></div>
    <div class="bar-face right"></div>
    <div class="bar-face back"></div>
    <div class="bar-face floor"></div>
  </div>
</div>
.bar {
  // -> The SCSS from before
  .bar-face {
    // -> The SCSS from before
    transform-origin: 50% 100%;
    &.roof {
      transform: translateZ(1em);
    }
    &.front {
      transform: rotateX(-90deg);
    }
    &.right {
      left: auto;
      right: -.5em;
      width: 1em;
      transform: rotateX(-90deg) rotateY(90deg) translateX(.5em);
    }
    &.back {
      transform: rotateX(-90deg) rotateY(0deg) translateZ(-1em);
    }
    &.left {
      width: 1em;
      transform: rotateX(-90deg)rotateY(-90deg) translateX(-.5em) translateZ(.5em);
    }
  }
}
通过上面的代码,我们可以制作出一个立方体,但是我们需要的是一个矩形的立方体,我们只需要增加.bar class的宽度即可制作出矩形立方体的效果。在这个例子中,宽度被设置为4em,得到如下图的效果:

创建百分比填充效果
进度条的百分比填充效果包含在立方体的各个面内,为了使HTML代码最小化,这里使用:before伪元素来制作百分比填充效果。这个有:before伪元素制作的百分比填充效果将根据它们各自的面的宽度来增长显示百分比。
<div class="perspective">
  <div class="bar" role="progressbar" aria-valuenow="0" aria-valuemin="0" aria-valuemax="100">
    <div class="bar-face roof percentage"></div>
    <div class="bar-face front percentage"></div>
    <div class="bar-face left"></div>
    <div class="bar-face right"></div>
    <div class="bar-face back percentage"></div>
    <div class="bar-face floor percentage"></div>
  </div>
</div>
.bar {
  // -> The SCSS from before
  .bar-face {
    // -> The SCSS from before
    &.percentage:before {
      content: '';
      display: block;
      position: absolute;
      bottom: 0;
      width: 0;
      height: 100%;
      margin: 0;
      background-color: rgba($magenta, .8);
      transition: width .6s ease-in-out;
    }
  }
}

接下来需要做的事情是设置百分比填充的样式。如果使用手动来编写100次填充样式(每增加1%要写一个对应的class)是一件非常乏味的工作。这里使用Sass来制作一个循环,从各个进度条的HTML代码中获取aria-valuenow的值。
.bar {
  // -> The SCSS from before
  .bar-face {
    // -> The SCSS from before
  }

  @for $i from 0 to 101 {
    &[aria-valuenow='#{$i}'] {
      .percentage:before {
                width: $i * 1%;
      }
    }
  }
}
因此,如果我们将HTML代码中的aria-valuenow属性的值从0变化到100,进度条将产生动画效果。
创建皮肤
为了创建各种不同的进度条皮肤效果,这里使用了Sass mixins。这里制作皮肤使用到的是box-shadow属性。这个属性支持使用一个数组值,通过数组我们可以模拟照明发光效果。在这个数组中包含了底部阴影和面的发光效果。
<div class="perspective">
  <div class="bar cyan" role="progressbar" aria-valuenow="75" aria-valuemin="0" aria-valuemax="100">
    <div class="bar-face roof percentage"></div>
    <div class="bar-face front percentage"></div>
    <div class="bar-face left"></div>
    <div class="bar-face right"></div>
    <div class="bar-face back percentage"></div>
    <div class="bar-face floor percentage"></div>
  </div>
</div>
@mixin build-skin($color, $name) {
  &.#{$name} {
    .floor {
      box-shadow:
        0 -0.2em 1em rgba(0,0,0,.15),
        0 0.2em 0.1em -5px rgba(0,0,0,.3),
        0 -0.75em 1.75em rgba($white,.6);
    }
    .left {
      background-color: rgba($color, .5);
    }
    .percentage:before {
      background-color: rgba($color, .5);
      box-shadow: 0 1.6em 3em rgba($color,.25);
    }

  }
}
.bar {
  // -> The SCSS from before
  @include build-skin(#57caf4, 'cyan');
}

在上图中可以看到,百分比填充应该要放置在立方体底面的前面,以遮住底面。通过简单的调整一下立方体HTML代码中各个面的顺序,就可以实现这个效果。
<div class="perspective">
  <div class="bar cyan" role="progressbar" aria-valuenow="75" aria-valuemin="0" aria-valuemax="100">
    <div class="bar-face roof percentage"></div>
    <div class="bar-face back percentage"></div>
    <div class="bar-face floor percentage"></div>
    <div class="bar-face left"></div>
    <div class="bar-face right"></div>
    <div class="bar-face front percentage"></div>
  </div>
</div>
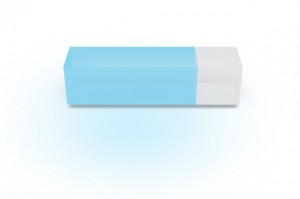
产生这种效果的原因是浏览器在渲染绝对定位的元素的时候,默认会为它们添加一个z-index属性(如果我们没有设置属性),所以当我们改变了渲染的顺序,然底面先渲染,它的阴影将会在所有的其他面的下面。

